| As
I’m a starting collector I was looking for a good deal, after looking around for a
few months I purchased my first helmet at Mart Aviation. The helmet was in good condition
but needed some restoration works. The deal was concluded and I received my very first
flight helmet with spare shell. Restoring a flight helmet is something I never had done
before. I received some tips and tricks from other collectors how to do it. Sometimes
there are many ways to do restoration works to helmets. Here you can read the story about
how I have restored my first flight helmet. My first helmet, the wrong model!
Unfortunately The PRK37 shell was build up as an HGU-47(V)4/P model helmet which is
used at the P-3 Orion. Normally a Microphone boom and the CX-4832A/AR communications cable
are attached to the HGU-47(V)4/P helmet so the shell I want to rebuilt to a HGU-33 has
some extra holes drilled for this parts which got to be filled.
Removing the reflective tape
Before filling up these holes I had to remove the old reflective tape from the helmet
shell and visor cover. I can tell you this is a heck of a job to do. 3M products are good
of quality but the glue they use is even better. Removing the reflective tape is almost
impossible. Due to heavy flight use and drying out by sunlight the tape on my helmet is
cracked and hardened out so if you try to pull the tape off it will break. After some
experiments I discovered that my girlfriend's hairdryer is the key to remove the
tape properly. First heat up the tape you want to remove by using the hairdryer, then cut
the tape off with a sharp, flexible knife blade. After spending hours removing all the
tape (with blisters on my thumb by pushing the knife blade) the shell is clean from tape
but the glue is still on the helmet. To remove this I had to do some new experiments. I
started by using an alcoholic based cleaner (same stuff to light up your BBQ) but this
takes hours to remove the glue so I decided to try another cleaning liquid. I purchased a
bottle of lighter fuel (same stuff you use for refilling your Zippo lighter). Take a piece
of cloth, add some of this fuel and slightly bring it on the glue layer (watch out to not
damage the edge roll of your helmet!!!) wait a minute to let the fuel do the work.
It’s magic!! The glue becomes soft and easy to remove. Just use a piece of cloth to
remove all the glue.
Filling up holes in a helmet shell
Finally, the helmet shell and visor cover is cleaned up and ready for filling up the
holes we don’t use anymore. To do this I purchased a car repair kit which normally
will be used to fill up holes in car chassis. At the inside of the helmet, I placed some
tape over the holes and filled up the holes from the outside. After a drying period of
approximately 5 minutes the material is hardened out. I used a fine piece of sandpaper
(400) to make the surface ready for taping.
Making the edge roll like new
The edge roll showed some heavy flight use. To make it proper I used shoe polish to
bring the leather in fine condition again. Heat up the shoe polish for a moment so it will
melt. Take a piece of cloth and bring it on the leather. When the shoe polish is melted it
will be much easier to bring it on.
The interior job
The interior of this PRK-37 shell was completely gone, except of the PRK-40 liner
assembly which missed the fitting pads. I removed the two piece styrofoam liners out of
the shell to replace it for a V-tech liner assembly. The cloth interior pads are also
missing. To repair this I used some velcro pads of 10x10cm for making a new interior
around the ear cup area. I glued this pads at the inside of the helmet shell after cutting
the pads in the right shape. I know this is not the right way to do it but it’s hard
to get the right cloth pads and it looks almost the same. After drying I attached the ear
cups to the velcro and try the helmet on my own head to see if the helmet will fit and
guess what: It fits!!
Taping the helmet
To make this helmet complete I ordered some reflective tape. Bringing on this tape was
much easier than I thought. When the tape is in new condition it's very flexible and easy
to bring on. A very useful tip is: Look very good how the helmet is taped before you
remove the old tape. Look to the angle the tape is on the shell. What you can do is, take
a picture of the old tape from different views. Use this pictures as reference when you
retape the helmet. When you bring on the tape do not stretch the tape! Before I
started taping I made a centerline with masking tape. The best way to start is at the
front of the helmet at the top.
The result
After bringing on the helmet art, mounting the Ox. receivers, interior, chinstrap,
visor cover etc. I'm fully satisfied of the result. For the datasheet of the HGU-33 you
can click here! This sheet is made by Steven C. Norris. If you
have additional information? Please send it to us or Steve. |
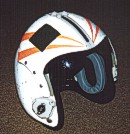
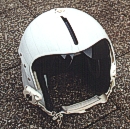
the helmet when I got it

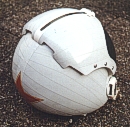
more detail of the tape

removing the tape

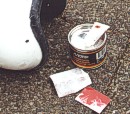
visorcover and some tools
filling up the holes
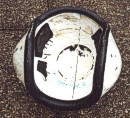
the interior
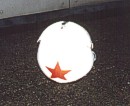
the result at night
the result at the front side
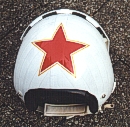
nice tapework isn't it?
and again a picture
|